Home > Window Treatments > Padded Pelmets
Making A Soft Padded Pelmet
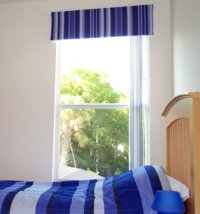
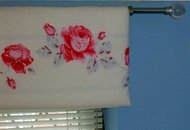
A do-it-yourself padded pelmet above a window is one of my favorite ideas for a contemporary window treatment.
|
|
It is easy, inexpensive and an attractive way to dress a window without obscuring a gorgeous view. In many cases now, high premiums are charged where a lovely view is available and if you have paid extra for a view - why hide it? You need a window treatment that will enhance the view rather than obscure it and if you are trying to save money, or have a lot of windows that you need to deal with, you really need to think about making them yourself. |
Don't be frightened! It's easier than you think...
One reason why padded pelmets are so economical is that you need a lot less fabric then you would if you chose curtains or drapes. They are quick and easy to make so you will save time as well as money.
The items required are a length of stiff card used for making pelmets - sometimes also known as Pelform, wadding or padding the same size and fabric to match or contrast with your room décor.
A small diameter curtain pole with attractive ends will be needed to hang your panel. The ‘tools’ you want to have to hand are a roll of masking tape, a box of pins and a needle and cotton and of course, a tape measure.
Choosing the fabric is always good fun and the choice is vast - almost overwhelming. Our top tip here though, is when you are creating a panel for a bedroom, buy an extra flat sheet or single duvet to match your bedding and use this fabric. You will never get a better match than when you do this.
So now you’ve got everything to hand, let’s get started with your first padded panel.
How to make a padded pelmet
In order to get your measurements correct, measure the length of the pole between the two brackets you will be using to fix to the wall, ensuring that this in wider than the window itself.
Cut your card or Pelform to the correct length and calculate how deep it should be by putting it up at the window, the top being where you will be placing the curtain pole. Too long and you will obscure some of the view and cut out light. Too short and you will be able to see the top of your window or blind heading.
|
|
Cutting the padding is very easy. It should be the same size as the card. Don't be afraid to cut it slightly too large – rather this than too small where the sharp edges of the card will show in your finished pelmet. Now you are ready to cut your fabric. The fabric should be six inches or 15cm longer at each end than your card. For the depth, it should be one and a half times the depth of the card. It is as simple as that! |
You are now ready to assemble your three pieces
Place the card on a table or on the floor, anywhere where it will be flat.
Most of the card available is sticky on either one or both sides so make sure the sticky side is up.
Using a sticky card makes handling the panel much easier whilst you are making it.
Carefully place the padding on the card. If your panel is quite long it may be easier to get someone to help you here but the majority can be done on your own.
How much sewing have you done yet – absolutely none!
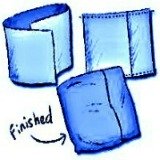
Lay the fabric, right side down, on a table or on the floor making sure there are no creases. Now place your padded card on the fabric, with the padded side to the material. The position of the card should be so that when you pull the fabric up over the bottom of the card it reaches the centre point.
Pull the sides of the fabric over the padded card and secure it with your masking tape. Make sure there are no creases on the front but don’t pull it so hard that you flatten the padding.
Do the same with the fabric at the bottom of the card, folding the corners onto the card like you were making the bottom of a bed. Again, secure with the masking tape.
Believe it or not, you've nearly finished your first padded pelmet!
Now fold the top corners and pull the top over your taped fabric as you had at the bottom and pin into place.
It is now time for the only bit of sewing in the process.
Sew along the visible edge (the bottom of the top, if that makes sense!). Leave the tape where it is, there is no need to remove it.
Now sew up the sides of the top flap leaving about 2.5 inches or 6cm open at each end at the top so you can thread the curtain pole through.
That’s it – done – ready to hang
To hang the padded pelmet, fix your brackets on the wall, push the pole through the top of your panel where you have left the open gaps and simply place the pole onto the brackets.
All done! Easy, wasn’t it?
What's Your Top Tip For Easy Window Treatments?
Do you have favorite window dressing ideas? Do you have a tip for a quick and easy window treatment? Some no sew window treatments you would love to share? If so, we'd love to hear from you.
Got a photo? We’d love to see it.
Want to link to a page on the internet? Perhaps your own website? Just type in the website address and I will turn it into a clickable link before adding the details to the site.







Enjoy this page? Please pay it forward. Here's how...
Would you prefer to share this page with others by linking to it?